Prison Bus Survival Guide: Keep Your Bus, Prisoners and Yourself Alive
How to keep the bus, the prisoners and yourself alive through a full Prison Bus run: garage prep, fuel and hunger management, roadside stops and a safe arrival.
Quick answer
Fix the bus before you leave the garage: four wheels on the hubs, then a full tank from the red Fuel Can. Press E to drive, watch the miles-left bar, fuel gauge and hunger meter, and use every roadside stop to refuel, restock and pick up prisoners.
- In normal modes revives are free, so mistakes are recoverable.
- Still arrive armed — in one recorded run, the danger continued inside the prison itself.
Keeping the bus, the prisoners and yourself alive through a full Prison Bus transport is one connected job, and the game's own description says it plainly: fix up the prison bus, drive it to pick up prisoners, survive the anomalies along the way, and get to the prison alive. Every system you touch — wheels, fuel, hunger, cash, weapons — feeds one of those stages, so surviving the road is mostly about how well you use the garage, the drive and the stops in between. (Brand new to the game? The beginner guide covers first-run basics.)
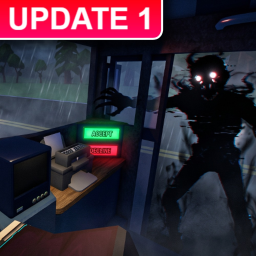
The run, end to end
A transport run has a fixed shape, and knowing it helps you prepare for each phase instead of reacting to it:
The Prison Bus run loop
- 1
Fix up the prison bus
Wheels and fuel in the garage before anything else.
- 2
Drive it to pick up prisoners
Pickup stops put your passengers on board.
- 3
Survive the anomalies
The road between stops is the hazard phase of the run.
- 4
Get to the prison alive
The miles-left bar reaching Prison is the goal of the run.
The first stage is the only one you fully control before trouble starts, and the last one has a twist covered at the end of this guide. Everything in between is managed from the driver's seat and at the stops along the way.
Get the bus roadworthy before you leave
A run starts in a garage, and an undrivable bus ends a transport before it begins. The recorded run this guide draws on opened with three quick jobs:
Checklist
- Grab the four wheels
Pick them up from the shelf; the hotbar shows Wheel x4 once you have the full set.
- Fit them to the bus
Install a wheel on each hub.
- Fill the tank
Use the red Fuel Can (10/10) on the bus before departing.
With the bus mobile, walk in through the front door, sit at the wheel and press E to Drive. The top of the screen now shows a miles-left progress bar toward Prison — it opened at 865 Miles Left in the recorded run — above a dashboard speedometer and fuel gauge. Those readouts are your survival instruments for the whole trip.
If any of the garage steps feel unclear hands-on, the bus repair guide and the controls page go through both in more detail.
What the survival HUD tells you
Once you are rolling, the screen doubles as your kit list, and each readout answers a different question, so it pays to know which is which:
| Readout | What it tells you |
|---|---|
| Miles-left bar (top of screen) | Miles remaining toward Prison — it opened at 865 Miles Left in the recorded run and counts down as you drive |
| Hotbar (9 slots) | The supplies you have already gathered — the recorded run carried a gas can, bandages, water bottles and a lantern |
| Hunger meter | The clock for you — one of the two gauges to check whenever you settle back into the driver's seat |
| Fuel gauge | The clock for the bus — the other sit-down check, sitting on the dashboard next to the speedometer |
| Cash counter | What you can spend at the next stop — $841.33 at one point in the recorded run |
Read them as separate resources, and remember that roadside stops are where the fuel gauge and hotbar get refreshed.
Every roadside stop is a chance to prepare
The route is broken up by stops. The exact mix and order can vary between runs, but the types seen in the recorded run each have a clear survival purpose:
| Stop | What happens there | Why it matters |
|---|---|---|
| Gas station (GAS STATION AHEAD prompt) | Refuel with the pump or a handheld nozzle at $5.00 per gallon | Keeps the fuel gauge healthy for the miles ahead |
| Sheriff office marked PRISONER PICKUP | An officer explains the rules, a prisoner boards, and a printer outputs a CRIMINAL report to review | This is how your passengers get on board — the point of the whole run |
| Roadside houses | You can walk through and gather supplies | Keeps the hotbar stocked as the run goes on |
| Night roadside shop | A shop you can enter with the bus parked outside | A late-run stop on the route |
| ARMY CHECKPOINT | Soldiers board and inspect the bus, then wave it through | Routine — let them look and keep moving |
A few of those deserve a closer look. The gas station's posted $5.00-per-gallon price is the same whether you use the pump or the handheld nozzle, so the cash counter on the HUD is really a fuel budget. The prisoner pickup is the run's reason for existing, and the CRIMINAL report its printer produces about your new passenger is worth a look before you pull away. Roadside houses are the quiet restocks of the route: free supplies, gathered just by walking through. The army checkpoint is the one stop where the visitors come to you, so there is nothing to do but let it happen.
For a fuller breakdown of the route itself, see the route guide; the pickup routine has its own page at how to pick up prisoners.
Surviving the anomalies between stops
The official description names the hazard directly: survive anomalies. This page stays focused on the survival loop around them — the anomalies page details the anomalies themselves and the enemies page covers what attacks you. The loop is the same one running through this whole guide: a bus that drives, fuel that lasts, supplies in the hotbar and cash to replace what gets used.
One rule softens the whole road: in the game's normal modes, revives are available for free. A bad encounter can be answered with a free revive in the normal modes. The exception is Hardcore mode, covered below, where that safety net is removed. The how to revive guide explains the revive flow in detail.
Recovery, healing and what the shop sells
When something goes wrong, the game offers both a free and a paid way back. Beyond the free normal-mode revives, the shop sells survival and recovery products, plus weapons if you want firepower. The prices below come from a public stats listing for the game; it lists the products but does not spell out each one's exact effect, so treat the names as the honest summary of what you would be buying.
Survival and recovery products
| Product | Price |
|---|---|
| Bandage | R$9 |
| Health Pack | R$19 |
| Medic Pack | R$39 |
| Revive | R$39 |
Weapons if you want firepower
| Product | Price |
|---|---|
| Baseball Bat | R$10 |
| Machete | R$25 |
| Pistol | R$35 |
| Sledge Hammer | R$35 |
| Double-barrel Shotgun | R$45 |
| Melee Pack | R$49 |
| Driver Class | R$49 |
The healing items page and the how to heal guide cover recovery in play, and the weapons page covers the armory.
Pick the mode that fits your run
The mode you choose sets how survivable the road is before you ever spawn into the garage:
Decision guide
Hardcore is only open to players who have already won the game, so your first runs are always on the friendlier terms. If that exclusive skin is the goal, the how to win guide covers the path, and the game modes page compares all the options.
The last miles: the prison is not a safe zone
The easiest survival mistake is relaxing at the sight of the prison gates. In the recorded run, reaching Blackwell Prison started the ending chain rather than a credits roll: the warden asked the player to escort prisoners to Cell Block 1, then ordered the guards to eliminate the group. The player fought back, used a CLEARANCE L1 keycard to open the high-clearance area, and confronted Professor Mike — a boss with a 3900 HP bar who summons shadow anomalies — and won the fight with rifles and melee. The run closed on the GOOD ENDING MERCY clear screen.
That exact sequence is not guaranteed to appear in every run, but it makes the point cleanly: prepare as if the final fight comes after the final mile, because in the recorded run it did. Everything the stops gave you — fuel to arrive, supplies to arrive intact, weapons to arrive dangerous — turns into endgame gear the moment the gates appear.
Habits that keep a run alive
Tips
Check two gauges at every sit-down
The fuel gauge is for the bus, the hunger meter is for you. Both stay on screen, and stops are where you refuel the bus and restock supplies.
Refuel on the prompt, not on fumes
Gas stations announce themselves with GAS STATION AHEAD, and fuel runs $5.00 per gallon of cash.
Let inspections finish
At the ARMY CHECKPOINT, soldiers board, inspect and wave you through. Nothing to do but let it happen.
Keep gathering as the miles drop
Roadside houses feed the hotbar; the recorded loadout of gas can, bandages, water bottles and lantern did not gather itself.
Arrive armed
In the recorded run, rifles and melee won a 3900 HP boss fight inside the prison itself.
Related Guides
Anomalies: What Appears and What Works
Learn where the shadow anomalies appear, how Professor Mike's fight works, and what actually works against them.
How to Heal
See which healing items you can buy, what Bandage, Health Pack, Medic Pack and Revive cost, and when to use each.
How Health Works
Understand how health works during a run, what drains it, and which items and passes restore it.
Game Modes Compared
Compare Standard, Hardcore, and Quick modes by entry requirements, difficulty, route length, and rewards.